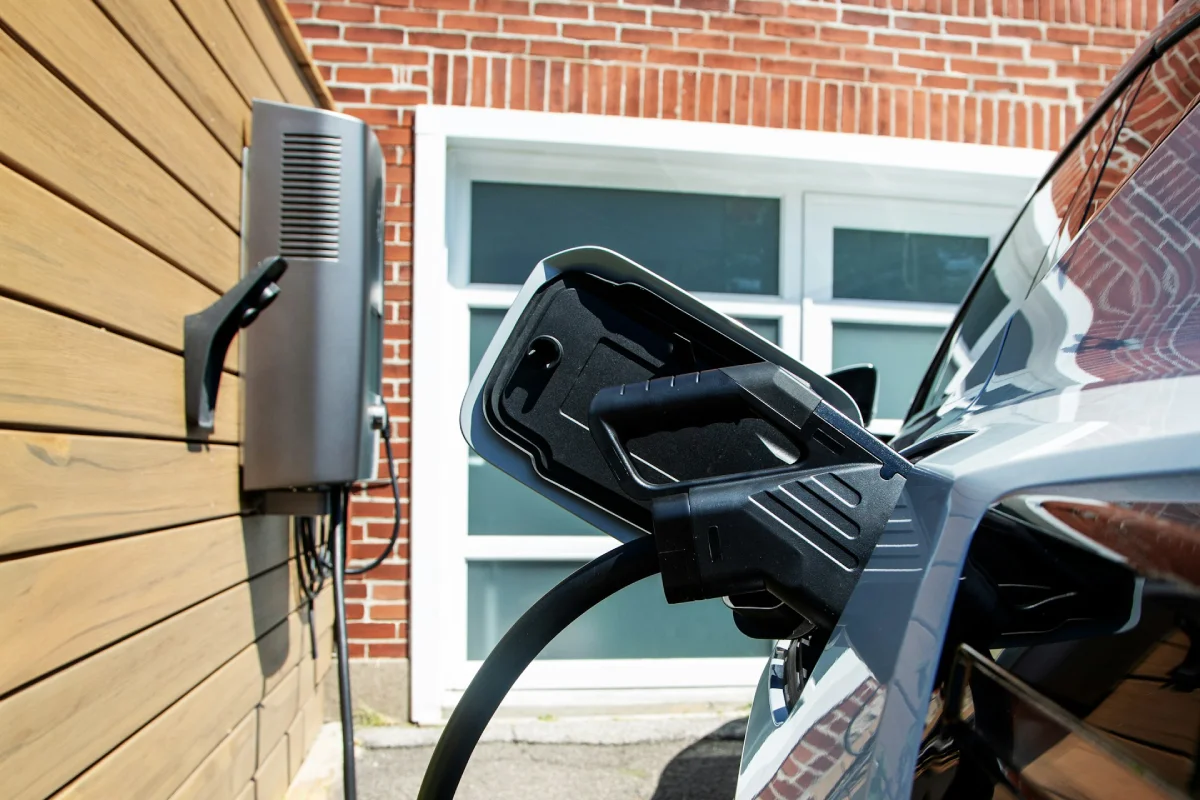
More homeowners are installing EV chargers right now than at any other time in history.
EV charging infrastructure in the United States has expanded from about 15,000 charging points in 2013 to nearly 193,000 by 2024, showing exponential growth driven by rising EV adoption, according to Visual Capitalist – EV Charging Boom — and that number keeps growing every year.
According to the U.S. EPA – Home EV Charging Guide, most EV owners charge at home, with Level 1 and Level 2 home charging accounting for the majority of everyday EV charging activity due to convenience and overnight charging capability.
But here’s the thing most articles won’t tell you: the charger itself is usually the easiest part of the whole project.
The real complexity? It’s hiding inside your walls. Your electrical panel, your circuit capacity, your wiring distance — that’s where most home EV charging setups succeed or fail.
This guide is for any homeowner thinking about installing a home EV charger. Whether you drive a Tesla, a Ford F-150 Lightning, a Chevy Equinox EV, or any other electric car — we cover the full picture here.
We walk you through every step of the process. We cover costs, permits, electrical requirements, common mistakes, and how to avoid them. We also show you how to get the most out of available tax credits and utility rebates.
And yes — installation complexity varies a lot depending on your home’s electrical setup. We’ll help you understand exactly where your home stands.
Key Takeaways
- Most homes need a 240-volt dedicated circuit for Level 2 EV charging — the kind that adds 20–44 miles of range per hour.
- A 100-amp panel can often support EV charging, but a load calculation is required first.
- Permits are required in most U.S. cities — skipping them creates serious insurance and resale risks.
- Installation costs range from $300 to $3,000+ depending on your home’s electrical situation.
- The federal tax credit may cover up to 30% of costs (up to $1,000 for homeowners), subject to IRS rules through 2032. IRS Alternative Fuel Vehicle Refueling Property Credit
- Smart load management systems can often help you avoid a costly panel upgrade.
- Level 2 chargers are the most common choice for residential EV charging in the U.S., driven by their faster charging speeds and compatibility with standard 240V home electrical systems.
This guide is for educational purposes only. Electrical installation standards in the United States are governed by the National Electrical Code (NEC), and most EV charger installations require compliance with local building codes and inspection approval. EV charger installation involves high-voltage electrical systems, and incorrect installation, wire sizing, or load miscalculation can create serious safety hazards, including fire risk. Always ensure work is performed or verified by a licensed electrician in accordance with applicable codes.
Table of Contents
- Key Takeaways
- What Is EV Charger Installation?
- How EV Charger Installation Works
- Level 1 vs Level 2 EV Charger Installation
- Electrical Requirements for EV Charger Installation
- Can Your Electrical Panel Support EV Charging?
- Choosing the Best Location for EV Charger Installation
- Permits, Inspections, and Code Compliance
- How Long Does EV Charger Installation Take?
- Common EV Charger Installation Mistakes
- Home EV Charger Installation Cost
- EV Charger Tax Credits and Rebates
- Choosing the Best EV Charger
- Hardwired vs NEMA 14-50 Plug-In Chargers
- EV Charger Installation Checklist
- Frequently Asked Questions
- Final Thoughts
What Is EV Charger Installation?

What an EV Charger Actually Does
An EV charger doesn’t generate electricity — it controls the flow of power from your home into your car’s battery.
Think of it like a faucet. Your utility sends electricity to your home. The charger (technically called EVSE — Electric Vehicle Supply Equipment) controls how fast that electricity flows into the battery.
Your charger and your car communicate constantly during a charging session. The car tells the charger how much power it can accept. The charger adjusts to match. This back-and-forth keeps the charging process safe and efficient.
So when people say “install an EV charger,” they really mean: install the dedicated electrical circuit, the outlet or wiring, and the EVSE unit that manages the charge.
EV Charger Installation vs EV Charging Station Installation
You’ll see both terms used interchangeably online. For homeowners, they mean the same thing.
“EV charging station installation” is a phrase more commonly used for commercial or public setups — like those in parking garages or shopping centers. But at home, it describes the same process.
Both terms refer to adding a dedicated charging setup to your property. The electrical requirements, steps, and costs are the same regardless of which phrase is used.
Why Home EV Charging Is Becoming the Preferred Option
Public charging networks are expanding fast. But 80% of all EV charging in the U.S. still happens at home, according to the U.S. Department of Energy.
The reason is simple: it’s the most convenient option available. You plug in when you get home. You wake up to a full battery. No detours, no waiting, no paying premium rates at a public station.
In some regions with time-of-use electricity pricing, off-peak home charging may be significantly cheaper than standard daytime rates, sometimes as low as $0.03–$0.10 per kWh depending on the utility provider. Compare that to $0.25–$0.65/kWh at public chargers, and the savings add up fast.
Home Charging vs Public Charging: Key Differences
| Feature | Home Charging | Public Charging |
|---|---|---|
| Speed | 3–44 miles/hour (Level 1–2) | Up to 200+ miles/30 min (DC Fast) |
| Cost Per kWh | $0.03–$0.15 (off-peak) | $0.25–$0.65 |
| Convenience | Plug in at home, charge overnight | Drive to station, may need to wait |
| Setup Cost | $300–$3,000+ (one-time install) | No setup required |
| Best For | Daily charging needs | Long road trips, emergency top-ups |
Home charging wins for everyday use. Public fast charging is great for long trips and emergencies.
How EV Charger Installation Works

Installing a home EV charger involves six clear steps. Let‘s walk you through each one.
1
Step 1: Assess Your Home’s Electrical Capacity
This is the most important step. Everything else flows from what your panel can handle.
An electrician will check your panel size, your current electrical load, and how much capacity is left. A 200-amp panel has far more room to work with than a 100-amp panel.
If plenty of capacity is available, installation is quick and affordable. If the panel is near its limit, you’ll need either a smart load management solution or a panel upgrade.
This single step can save you thousands of dollars in surprises later.
2
Step 2: Choose the Right EV Charger
Once you know your electrical capacity, you can pick a charger that fits.
Most homeowners choose a 32-amp or 48-amp Level 2 charger. These units deliver 25–44 miles of range per hour of charging time. Smart chargers with Wi-Fi and scheduling are worth the extra cost for most people.
Always check your car’s maximum onboard charger rating before buying anything. There’s no point installing a 48-amp charger if your car only accepts 32 amps.
3
Step 3: Select the Installation Location
Where you put the charger matters more than most people realize.
The closer the charger is to your electrical panel, the less wire is needed — and the lower your cost. Most installs go in an attached garage. That’s the ideal setup.
Outdoor installations are completely doable but require weatherproof equipment and extra planning. We cover location options in detail later in this guide.
4
Step 4: Obtain Required Permits
In most U.S. states and municipalities, an electrical permit is required before installation starts.
Your electrician typically handles this step for you. But it’s important to confirm upfront that they will. Don’t assume.
Skipping permits might save a few hundred dollars now. But the financial risk down the road — from insurance denials and home sale complications — is much larger.
5
Step 5: Install the Dedicated Circuit and Charger
This is the hands-on part. An electrician runs a new circuit from your panel to the charger location.
They install a new dedicated breaker, run wire in conduit, and mount the charger unit on the wall. For hardwired chargers, they make a direct wiring connection. For plug-in setups, they install a NEMA 14-50 outlet first.
A straightforward install in an attached garage usually takes 2–4 hours.
6
Step 6: Inspection, Testing, and Activation
After installation, a local inspector checks the work. They verify breaker size, wire gauge, connections, mounting, and code compliance.
If everything passes, they sign off and you’re cleared to use the charger. If any corrections are needed, the electrician fixes them and re-inspection is scheduled.
Once cleared, most smart chargers walk you through setup via a smartphone app in minutes.
Typical EV Charging Installation Timeline
| Phase | Typical Time |
|---|---|
| Initial electrician assessment | 1–2 days |
| Permit application and approval | 1–10 business days |
| Electrician scheduling | 1–7 days |
| Physical installation | 2–8 hours |
| Inspection scheduling | 1–7 days |
| Realistic total (start to finish) | 1–4 weeks |
Start the process early — ideally before your new EV arrives. Some cities move fast. Others can stretch the permit and inspection phase out considerably.
Level 1 vs Level 2 EV Charger Installation

This is one of the most common questions we get. Let’s break it down clearly.
What Is Level 1 Charging?
Level 1 charging uses a standard 120-volt outlet. The same kind you plug your phone charger into.
Your EV comes with a charging cable that connects directly to a regular wall outlet. No special equipment or installation is needed.
Level 1 adds about 3–5 miles of range per hour. If you drive 30 miles a day, you’ll need roughly 6–10 hours to recover that range overnight. It works — but barely for most full battery EVs.
What Is Level 2 Charging?
Level 2 charging uses a 240-volt circuit — the same voltage that powers your electric dryer or oven.
It charges 5–8 times faster than Level 1. A good Level 2 charger adds 20–44 miles of range per hour, depending on your charger’s amperage and your car’s onboard charging rate.
Level 2 charging requires a dedicated 240V circuit installation, which adds to upfront cost but delivers significantly faster charging speeds. This is why it is widely used for home EV charging in the U.S., according to the U.S. Department of Energy. U.S. DOE Home EV Charging.
Charging Speed Comparison
| Charger Type | Voltage | Miles Added Per Hour | Full Charge (60 kWh Battery) |
|---|---|---|---|
| Level 1 | 120V | 3–5 miles | 40–60+ hours |
| Level 2 (24A) | 240V | ~15–18 miles | ~12–15 hours |
| Level 2 (32A) | 240V | ~20–25 miles | ~8–10 hours |
| Level 2 (48A) | 240V | ~30–44 miles | ~5–7 hours |
| DC Fast Charger | 480V+ | 100–200+ miles | 20–45 minutes |
Installation Requirements Comparison
| Feature | Level 1 | Level 2 |
|---|---|---|
| Outlet Needed | Standard 120V wall outlet | New 240V dedicated circuit |
| Breaker Required | 15A or 20A (existing circuit) | New 40A–60A dedicated breaker |
| Electrician Needed? | No (if outlet exists) | Yes — strongly recommended |
| Special Equipment | None — uses car’s included cable | EVSE unit required ($150–$700) |
| Permits Required? | Usually not | Usually yes |
Cost Comparison
| Feature | Level 1 | Level 2 |
|---|---|---|
| Equipment Cost | $0 (cable included with car) | $150–$700 for charger |
| Installation Cost | $0 (uses existing outlet) | $300–$1,500+ |
| Total Cost | $0–$150 | $450–$2,200+ |
| Monthly Savings vs Gas | Same as Level 2 | Same as Level 1 |
Level 2 costs more upfront. The speed and convenience pay off fast.
Which Option Is Best for Most Homeowners?
If you drive more than 25–30 miles per day, Level 2 is the clear winner.
Level 1 can work for plug-in hybrids (PHEVs) with small batteries, or for drivers with very short daily commutes. But for a full battery electric vehicle — especially larger trucks, SUVs, or long-range sedans — Level 1 is rarely fast enough.
If you’re unsure, think about this: do you want to wake up to a full battery every morning, or a partial one?
Why Level 2 EV Charger Installation Dominates Residential Installations
Speed matters. Most EV owners want a full charge overnight — not every two nights or three nights.
Level 2 also future-proofs your setup. EV batteries are getting larger every generation. A 100+ kWh battery that takes 25 hours on Level 1 takes only 6–7 hours on a 48-amp Level 2 charger.
Level 2 chargers are the most widely adopted solution for residential EV charging in the United States, and their use continues to grow as EV adoption increases.
According to the U.S. Department of Energy’s Alternative Fuels Data Center, nearly 80% of public EV charging ports in the United States are Level 2. This reflects the broader dominance of Level 2 charging in both public infrastructure and residential charging adoption trends.
Electrical Requirements for EV Charger Installation

This section covers the technical side — but let’s keep it clear and practical.
Why EV Chargers Require a Dedicated Circuit
An EV charger draws power continuously for hours on end. That’s very different from your microwave or toaster, which run for minutes at a time.
Sharing a circuit with other appliances during a 6–10 hour charging session creates real risk. Overloaded circuits trip breakers, overheat wires, and create fire hazards.
A dedicated circuit means that entire circuit is reserved for the EV charger. Nothing else pulls from it. This is a code requirement — not just good practice.
Understanding Continuous Loads and the NEC 80% Rule
The National Electrical Code (NEC) classifies EV charging as a “continuous load.” This is any load that runs for 3 or more hours at a stretch.
The rule: a circuit can only handle 80% of its rated capacity for a continuous load. So a 50-amp circuit can only run a 40-amp continuous load. A 60-amp circuit can run a 48-amp load.
In practice, this means:
- A 32-amp charger requires a 40-amp circuit
- A 40-amp charger requires a 50-amp circuit
- A 48-amp charger requires a 60-amp circuit
Your electrician factors this into every installation automatically.
Breaker Requirements for EV Charging
| Charger Amperage | Required Circuit Breaker Size |
|---|---|
| 16A | 20A |
| 24A | 30A |
| 32A | 40A |
| 40A | 50A |
| 48A | 60A |
Most residential Level 2 installations use a 40-amp or 50-amp breaker. Both are very common and widely available.
Wire Sizing Requirements
The wire must match the breaker. Using wire that’s too thin for the circuit is one of the most dangerous electrical mistakes possible.
| Breaker Size | Minimum Wire Gauge (Copper) |
|---|---|
| 20A | 12 AWG |
| 30A | 10 AWG |
| 40A | 8 AWG |
| 50A | 6 AWG |
| 60A | 6 AWG |
For longer wire runs, a larger gauge is sometimes required to prevent voltage drop. Your electrician handles these calculations.
Indoor vs Outdoor Electrical Requirements
Indoor installations (like an attached garage) use standard wiring in conduit. The work is straightforward and protected from the elements.
Outdoor installations require:
- A weatherproof (NEMA 3R or NEMA 4) rated charger
- Weatherproof conduit and junction boxes
- GFCI protection (required in most jurisdictions for outdoor circuits)
Don’t install an indoor-rated charger in an exposed outdoor location. The ratings exist for a reason.
Understanding Local Electrical Codes
The NEC sets the national baseline. But your city or county may have stricter requirements on top of that.
Some areas require specific conduit types (like metal conduit instead of plastic). Others require GFCI protection even for indoor garage installations. A few municipalities require utility notification before a new 240V circuit is added.
An electrician who regularly works in your area will already know these local requirements. This is one more reason to hire someone local rather than a national chain.
Can Your Electrical Panel Support EV Charging?
This question determines whether your installation will be simple or complicated. Let’s walk through it.
Understanding 100-Amp, 150-Amp, and 200-Amp Service
Your panel’s “service size” is the total electricity it can safely deliver to your home at one time.
100-amp service: Common in older or smaller homes. It may support EV charging in some cases, depending on overall household electrical load, but available capacity is often limited and requires a proper load calculation.
150-amp service: Less common. Exists in a middle range of homes. Usually adequate with a load calculation.
200-amp service: The standard in most homes built after 1980. Comfortable for EV charging in most situations.
400-amp service: Found in newer, larger homes — especially those with solar, a heat pump, and an EV. Plenty of headroom.
Knowing your panel size is the starting point for every installation discussion.
How Electricians Perform Load Calculations
A load calculation adds up the power demand of everything in your home — HVAC, water heater, kitchen appliances, lighting, and other major electrical loads. To understand which systems typically consume the most electricity, see What Uses the Most Electricity in a Home? 3 Big Fixes.
Then it compares that total to your panel’s rated capacity. The difference is your “available capacity” for new loads like an EV charger.
This calculation is performed in accordance with National Electrical Code (NEC) Article 220. It takes about 30 minutes for a thorough electrician. And it’s one of the most valuable things you can have done before installation.
Signs Your Panel May Need Upgrading
Watch for these warning signs before adding any large new electrical load:
- Breakers trip frequently — especially when multiple appliances run at once
- Your home has a fuse box instead of a breaker panel
- Your panel is 30+ years old
- You notice visible signs of damage such as scorch marks, burning odors, or unusual buzzing sounds near the electrical panel
- Your electrician says available capacity is already at or near its limit
If any of these sound familiar, have your panel inspected before scheduling an EV charger install.
When a Service Upgrade Is Required
Sometimes the panel simply doesn’t have room for a new 40–60 amp circuit. No calculation tricks or smart devices will change that.
In those cases, a panel upgrade is necessary. This means replacing the existing panel with a larger one — typically upgrading from 100A to 200A service.
Panel upgrades typically cost between $1,500 and $4,000 in the U.S., although pricing can vary based on local labor rates, permit requirements, and whether a utility service upgrade is also needed.
It’s an investment — but it often pays for itself by also enabling other upgrades like a heat pump or additional circuits.
Smart Load Management Systems Explained
Here’s some genuinely good news for homeowners with tight panels.
Smart load management systems monitor your home’s total electrical usage in real time. When your home is drawing a lot of power — say, the AC, dryer, and oven are all running — the system automatically reduces EV charging speed.
When demand drops, charging ramps back up. The total draw never exceeds your panel’s safe limit.
Smart load management systems—such as products like Emporia Vue, Span smart panels, and similar solutions from other manufacturers—monitor real-time electrical usage and automatically adjust EV charging to prevent overloading the main panel. You don’t have to think about it.
Alternatives to Expensive Panel Upgrades
Before committing to a full panel upgrade, consider these options:
1. Smart load management device — Keeps total usage within panel limits by adjusting charging speed dynamically.
2. Lower-amperage charger — A 24-amp or 32-amp charger uses far less capacity than a 48-amp unit. For most daily drivers, the speed difference is manageable.
3. Time-of-use scheduling — Program the charger to run only after midnight when other loads in the house are minimal.
4. Sub-panel installation — Adding a dedicated sub-panel in the garage is sometimes cheaper than upgrading the main service.
Talk through all of these options with your electrician before deciding on a full upgrade.
Choosing the Best Location for EV Charger Installation

Where you mount the charger affects both cost and daily convenience. Here’s a breakdown of every common scenario.
Garage Installations
An attached garage is the best location for most homeowners — full stop.
It’s protected from weather. It’s typically the closest point to the electrical panel. And the charger is secure and out of sight.
Wall-mount the charger at a height that makes daily plugging in easy. Most people mount between 48–60 inches off the floor.
Outdoor EV Charger Installation
No garage? Outdoor installation is a solid alternative.
You need a charger rated for outdoor use — at minimum NEMA 3R (rain-resistant), ideally NEMA 4 (protects against wind-driven rain and splashing water).
The electrician runs conduit along the outside of your home to the charger location. A properly installed outdoor charger handles rain, heat, humidity, and cold without issue.
Many homeowners install outdoor chargers under a carport, on a side wall, or near a driveway parking pad.
Detached Garage Installations
A detached garage adds complexity — but it’s a very common setup.
A new circuit needs to run from your main panel to the separate structure. That typically means digging a trench, laying conduit underground, and pulling wire through it.
Trenching runs $5–$20 per linear foot on average. A 50-foot run between your home and a detached garage could add $250–$1,000 to the project cost.
For many homeowners who regularly use a detached garage, the added cost of trenching is often justified by the convenience of dedicated home charging.
Driveway Charging Stations
If there’s no garage and no nearby wall, a pedestal-mounted charger near the driveway is another option.
This requires running conduit underground to the pedestal location. The electrician anchors the pedestal in concrete and connects the charger on top.
It’s more involved than a wall mount, but it gives you a clean, protected charging station right where you park.
Wall-Mounted vs Pedestal-Mounted Chargers
| Feature | Wall-Mounted | Pedestal-Mounted |
|---|---|---|
| Best For | Garage, side of house | Driveway, open yard |
| Install Cost | Lower | Higher (pole + concrete) |
| Appearance | Clean, tucked away | Freestanding, visible |
| Cord Access | Easy from parking spot | Flexible placement |
| Installation Complexity | Standard | More complex |
Wall-mounted is the go-to for most homes. Pedestal is the right call for properties with no suitable wall near the parking area.
How Distance from the Electrical Panel Affects Installation
Every additional foot of wire between your panel and your charger costs money. Here’s a general sense of how distance drives cost:
Short run (under 25 feet): Fast and inexpensive. Less than $200 in materials for most runs.
Medium run (25–50 feet): Standard job. $300–$600 in materials depending on wire gauge and conduit.
Long run (50–100 feet): More wire, possibly a larger gauge to prevent voltage drop, more labor. Materials alone can exceed $600–$900.
Long run with underground trench: All of the above, plus $500–$2,000+ for excavation and burial.
When possible, choose a charger location on the same wall as your panel — or at least on the same side of the house. It’s one of the easiest ways to control cost.
Permits, Inspections, and Code Compliance
Let’s talk about the step most people want to skip — and why you really shouldn’t.
Do You Need a Permit for EV Charger Installation?
In most U.S. cities and counties, yes — an electrical permit is required.
Any time you add a new circuit to your home, local electrical code requires a permit and inspection before the work goes live, as outlined in the U.S. Department of Energy’s home charging guidance. Level 2 EV charger installations almost always fall under this requirement.
There are limited exceptions in certain jurisdictions for very minor work. But a new 40–60 amp dedicated circuit is never minor work.
How the Inspection Process Works
After installation is complete, you (or your electrician) schedule an inspection with your local building or electrical department.
An inspector visits your home. They verify the breaker size, wire gauge, connections, and that the installation meets local code requirements. Inspection visits typically take approximately 20–45 minutes.
If it passes: signed off. You’re cleared to use the charger.
If corrections are needed: the electrician fixes them and a re-inspection is scheduled.
Common Code Requirements
These requirements are based on the National Electrical Code (NEC) and are enforced through local electrical inspections to ensure safe and compliant EV charger installations.
Depending on your location, an inspector may verify:
- Dedicated circuit with correct breaker amperage
- Correct wire gauge for the circuit length
- GFCI protection (required in many areas for garages and outdoor circuits)
- Weatherproof enclosures for any outdoor wiring
- Proper grounding and bonding
- Breaker clearly labeled in the panel
Your electrician should know every one of these requirements for your specific area. When hiring, always ask: “Have you done EV charger installations in this city before?”
Risks of Unpermitted Installations
Skipping a permit can save $100–$300 upfront. The risks attached to that decision are much larger:
Homeowner’s insurance: If an electrical fire is linked to unpermitted electrical work, your insurer may deny or limit coverage.
Home sale complications: Unpermitted electrical work often surfaces during buyer inspections. You may be required to tear it out and redo it — at your expense — to close the sale.
Liability: If a problem injures someone, unpermitted work puts you in a very difficult position legally.
A permit is cheap insurance. Treat it that way.
Insurance and Liability Considerations
Unpermitted electrical work can create insurance complications if a claim involves the installation.
If a fire or incident is linked to unpermitted electrical work, coverage disputes may arise depending on the policy and circumstances. In a worst-case scenario, that means paying for fire damage out of pocket.
Take the permit. It’s one of the best $100–$300 investments you can make.
Homeowner Permit vs Contractor Permit
In many states, homeowners can legally pull their own electrical permit for work on their own home.
But most electricians pull the permit as part of their service. This is the norm — and the easier path for most homeowners.Before signing any contract, confirm: “Are you pulling the permit for this job?” A clear yes is the right answer. An electrician who says permits aren’t necessary? Walk away.
How Long Does EV Charger Installation Take?
The physical installation itself is often the fastest part. Here’s a realistic breakdown of every phase.
Simple Installations
Physical work time: 2–4 hours
A simple installation means your panel has open capacity, the charger location is close to the panel, there are no concrete walls or finished ceiling obstacles, and no special wiring challenges exist.
This is the best-case scenario. A skilled electrician can handle this in a single morning.
Moderate Installations
Physical work time: 4–8 hours
Moderate jobs involve longer wire runs, outdoor conduit work, or some panel work. Maybe you’re installing in a detached garage. Maybe the charger location is on the opposite side of the house from the panel.
These take most of a day.
Complex Installations
Physical work time: 1–2 days
Complex jobs include panel upgrades, service upgrades, extensive trenching to a detached structure, or tricky routing through finished walls and ceilings.
These require more planning, more labor, and sometimes a second visit to complete.
Permit and Inspection Delays
Here’s where most timeline surprises happen.
Some cities issue permits online within 24 hours. Others take 1–2 weeks. Inspections may be scheduled anywhere from the next day to 2 weeks out, depending on how busy your local inspectors are.
Ask your electrician specifically: “How long do permits and inspections typically take in this city?” Someone who works locally will know.
Utility Coordination Delays
If your installation requires a service upgrade — meaning the utility company needs to upgrade the line from the street to your home — you’ll need to coordinate with your electric utility.
Utility scheduling can sometimes add 2–8 weeks in some areas. This is entirely outside the electrician’s control.
If a service upgrade is even a possibility, start the process early.
Realistic Installation Timelines From Start to Finish
| Scenario | Total Timeline |
|---|---|
| Simple install, fast-permit city | 1–2 weeks |
| Moderate install, average city | 2–4 weeks |
| Complex install, busy city | 4–8 weeks |
| Requires utility service upgrade | 6–12+ weeks |
The takeaway: start this process before your EV arrives, not after.
Common EV Charger Installation Mistakes
Over the years, we’ve tracked the mistakes that cost homeowners money and headaches. Here are the ones that come up most often.
Choosing the Wrong Charger
Some homeowners buy a 48-amp charger when their panel can only support a 32-amp circuit. Others buy a charger that exceeds their car’s maximum onboard charging rate — and then wonder why it’s not faster.
Before you buy anything: check your car’s owner’s manual for maximum AC charging rate. A Tesla Model 3 Long Range accepts up to 48A. A Nissan Leaf tops out at 24A on AC. Buying above your car’s limit won’t speed anything up.
Ignoring Electrical Capacity Limits
This is the most expensive mistake we see.
A homeowner skips a load calculation, installs a 50-amp circuit, and then their main breaker trips every evening when the EV, the air conditioner, and the dryer run at the same time.
A load calculation takes 30 minutes and costs little or nothing when done as part of an estimate. It can save you from a $2,000+ panel upgrade later.
Underestimating Installation Complexity
People see a 10-minute YouTube video of a simple garage install and assume theirs will be the same.
But your home might have a full panel, finished walls, concrete block, or 80 feet between the panel and the parking spot.
Get an in-person assessment from an electrician before setting your budget. Online quotes are often inaccurate because they can’t account for your specific home layout.
Hiring Unqualified Contractors
An EV charger installation involves live 240-volt wiring, a new dedicated circuit, and panel connections. This is not a DIY project for someone without proper electrical training.
Always hire an electrician with real residential electrical experience. Ask specifically if they’ve done EV charger installations before. Ask how many. Ask for a reference.
Verify that they are properly licensed or authorized to perform electrical work in your state before signing anything. These are reasonable questions. A qualified pro won’t hesitate to answer them.
Skipping Permits and Inspections
We said it before. We’ll say it again.
Insurance coverage disputes. Home sale complications. Safety risks. The consequences of skipping permits are real and costly.
If your electrician suggests skipping permits to save time or money, find a different electrician.
Installing the Charger in the Wrong Location
Mounting the charger too far from where you actually park. Installing it at a height that makes plugging in awkward. Putting it where the cord barely reaches your charge port.
Before the electrician mounts anything, park your car in its typical parking position. Mark the exact spot on the wall. Measure cord reach. Get it right before the holes are drilled.
Failing to Plan for Future EV Needs
You have one EV today. But what about next year — or the year after?
If there’s any chance a second EV is in your future, ask your electrician about running empty conduit for a second circuit now. The marginal cost of adding conduit while the walls are open is small. Running it again later after the walls are closed is much more expensive.
Future-you will be grateful.
Overlooking Utility Rebates and Incentives
We see this constantly. Some homeowners miss out on available utility rebates that can reduce installation costs by hundreds of dollars.
Many electric utilities offer rebates for Level 2 charger installations. Some provide free smart load management devices. Some offer reduced-cost off-peak electricity rates that cut your monthly charging cost in half.
Search “[your utility name] EV charger rebate” before installation. Check DSIRE (Database of State Incentives for Renewables & Efficiency) for your state’s programs. This five minutes of research can save you real money.
Home EV Charger Installation Cost
Let’s be direct: EV charger installation costs vary a lot. The charger is often not the biggest expense. Your home’s electrical situation is.
What Determines Installation Cost?
Electrical Panel Capacity
If your panel has open capacity and just needs a new 40–50 amp breaker added, you’re in the lower cost range.
If you need a full panel upgrade — replacing a 100-amp panel with a 200-amp panel — expect $1,500–$4,000 in added cost. This single factor can double or triple your total installation bill.
Wiring Distance
More distance between the panel and charger means more wire, more conduit, and more labor.
A 10-foot run typically costs about $150–$300 in materials. A 75-foot run can easily push material costs into the $600–$900 range before labor.
Labor Costs
Electrician labor rates vary widely by region. In higher-cost areas such as California, New York, or Seattle, electrician labor rates commonly fall in the $100–$150 per hour range for skilled electrical work.
In lower-cost areas, rates run $60–$90 per hour. Most straightforward installs take 2–5 hours of labor.
Permit Fees
Permit fees depend on your city or county. Most range from $50 to $300. Some municipalities charge a percentage of the project’s total value.
Always ask your electrician to include permit fees in their estimate.
Installation Complexity
Concrete walls, finished basements, long conduit runs, underground trenching, panel work — each of these adds labor time and cost.
The more complex the job, the higher the final bill. This is why in-person assessments beat online quotes every time.
Typical Cost Ranges for Residential Installations
| Scenario | Estimated Total Cost |
|---|---|
| Basic install, 200A panel, garage close to panel | $300–$700 |
| Moderate install, longer run or outdoor | $700–$1,500 |
| Panel upgrade required (100A → 200A) | $1,500–$4,000 |
| Full service upgrade (utility + panel) | $3,000–$6,000+ |
| Detached garage with underground conduit run | $1,500–$3,500 |
For most homeowners with a 200-amp panel and an attached garage, expect to pay $400–$1,200 total. That’s before any rebates or tax credits, which can reduce your out-of-pocket cost by $300–$1,000 or more.
Why Costs Vary So Much Between Homes
No two homes are identical. A 1960s ranch with a 100-amp fuse box costs far more to upgrade than a 2018 new build with a 200-amp panel and a dedicated EV conduit already roughed in.
Home age, panel capacity, charger location, wiring distance, and local labor rates all affect the final number. That’s why getting 2–3 quotes from local electricians is so important.
Prices can vary by hundreds — sometimes thousands — of dollars for the same job in the same neighborhood.
👉 For a full cost breakdown: [Home EV Charger Installation Cost]
EV Charger Tax Credits and Rebates
Here’s some good news: you don’t have to pay full price for your installation.
Federal EV Charger Incentives
The Alternative Fuel Vehicle Refueling Property Credit (IRS Form 8911) is still active as of 2026.
Official IRS guidance: IRS Form 8911 – Alternative Fuel Vehicle Refueling Property Credit
Eligible homeowners may claim a federal tax credit equal to 30% of qualified EV charging equipment and installation costs, subject to IRS requirements and location-based eligibility rules. The maximum residential credit is currently $1,000, subject to applicable IRS rules.
As of 2023, location-based eligibility requirements apply. To qualify, your home must be in a low-income or non-urban census tract. The IRS provides a lookup tool to verify eligibility.
This credit is available through tax year 2032. A tax professional can confirm your eligibility for your specific situation.
State Incentive Programs
Many states offer additional incentives layered on top of the federal credit. State incentive programs change frequently, and funding availability may vary over time.
California — TECH Clean California offers income-qualified rebates for home charging equipment.
New York — NYSERDA supports EV charging incentives through its utility partners.
Colorado — A state income tax credit is available for EV charging equipment purchases.
Washington, Oregon, Illinois, and others — Each has its own programs that change periodically.
Check your state energy office’s website or search (Database of State Incentives for Renewables & Efficiency) for current programs in your state.
Utility Company Rebates
This is where the most commonly missed money lives.
Many electric utilities — including PG&E, Xcel Energy, Eversource, National Grid, and others — offer rebates that can reduce the cost of a Level 2 charger installation by several hundred dollars.
Some utilities also offer free smart load management devices to customers upgrading to EV charging. Others provide subsidized installation programs for income-qualified customers.
Search “[your utility name] EV charger rebate” before installation day. Apply before the work is done — some programs require pre-approval.
Time-of-Use Electricity Programs
Beyond rebates, many utilities offer Time-of-Use (TOU) pricing — variable electricity rates based on time of day.
Off-peak rates are often significantly cheaper than peak rates. If you charge your EV overnight on a Time-of-Use plan, you can reduce your charging costs substantially.
If you’re concerned about the impact of EV charging on your monthly utility bill, see Why Is My Electricity Bill So High in 2026? 7 Ways to Cut It.
Most smart Level 2 chargers let you program scheduled charging automatically so you never charge at peak rates.
Documentation You Should Save
Keep all of this in a dedicated folder — digital and physical copies:
- Charger purchase receipt
- Electrician’s invoice (showing equipment and labor separately)
- Permit and inspection sign-off records
- Utility rebate application confirmation
- Photos of the completed installation
- IRS Form 8911 (filed with your tax return)
You’ll want these for your tax filing, potential insurance questions, and eventually your home sale.
Common Eligibility Requirements
- Equipment must be new (not used)
- Property must meet location requirements (federal credit)
- Installation must be completed within the tax year you’re claiming
- Some state credits apply only to primary residences
- Utility rebates may require pre-approval before installation
Always confirm current requirements directly with the IRS, your state energy office, and your utility. Programs change, and the details matter.
👉 Full credit and rebate details: [EV Charger Tax Credit Guide]
Choosing the Best EV Charger
The charger market has exploded. Dozens of brands, hundreds of models. Here’s how to cut through the noise and choose the right one for your home.
Features That Matter Most
Not every feature on the spec sheet matters equally. Focus on these:
Charging speed (amperage rating) — This is the most important spec. Higher amps = faster charging. Match the charger’s output to your car’s maximum onboard charging rate. Don’t overpay for speed your car can’t use.
Cord length — Look for at least 20–25 feet. You want comfortable reach to your car’s charge port without strain.
Durability and outdoor rating — For any outdoor installation, NEMA 3R or better is required. For harsh climates, NEMA 4 is worth it.
Warranty — At minimum, look for a 3-year warranty. Several top brands now offer 5-year or even lifetime coverage.
Smart Charging Features
A smart charger connects to your home Wi-Fi. You control it from your phone.
Schedule charging to run during off-peak hours. Monitor how much energy each session uses. Set alerts if charging stops unexpectedly. Track monthly costs.
For most homeowners planning to use TOU electricity pricing, a smart charger pays for itself within a year or two in electricity savings.
Adjustable Amperage
Some chargers let you manually dial down the amperage output. This is useful if your panel has limited headroom.
You might set the charger to 24A normally, and bump it to 32A on weekends when the dryer and AC aren’t competing for panel capacity.
This kind of flexibility is genuinely useful in real-world homes — not just a gimmick.
Wi-Fi and Energy Monitoring
Energy monitoring lets you see exactly what EV charging costs you each month — by session, by week, by month.
Over time, you’ll know your cost per mile driven. You can compare charging costs to gas costs side by side. It makes the economics of EV ownership concrete and visible.
Indoor vs Outdoor Ratings
Indoor chargers typically carry a NEMA 1 rating. That’s fine for a closed, dry garage.
For outdoor installations, you need a minimum NEMA 3R (protects against rain). NEMA 4 is better for wet climates, coastal areas, or exposed installations.
Always check the product’s official NEMA rating before buying for any outdoor use.
Future-Proofing Your EV Charger Purchase
EV batteries are getting bigger. The average new EV in 2025 has a 75–100+ kWh battery.
If your panel supports it, buying a 48-amp charger today often makes more sense than a 32-amp unit — even if your current car doesn’t use the full charging capacity. Your next EV may.
Spending an extra $100–$150 now for future-ready speed is almost always worth it.
Top Considerations Before Buying
Before purchasing, answer these:
- What is my car’s maximum onboard AC charging rate?
- Will the charger be installed indoors or outdoors?
- Do I want app control and energy monitoring?
- What cord length do I need from the mounting location to my car’s port?
- Hardwired or plug-in (NEMA 14-50)?
- Does my panel support this charger’s amperage?
Get clear answers to all six and you’ll pick the right charger every time.
👉 For full side-by-side reviews: Best Home EV Chargers (coming soon)
Hardwired vs NEMA 14-50 Plug-In Chargers
This debate comes up in almost every homeowner conversation. Here’s the clear breakdown.
What Is a NEMA 14-50 Installation?
A NEMA 14-50 is a 240-volt, 50-amp outlet. It looks like an oversized standard outlet, and it’s the same type used for electric dryers and ranges in many homes.
Your electrician installs this outlet on its own dedicated circuit. Your EV charger then plugs directly into it — just like a regular appliance.
If you ever want to swap the charger for a newer model, you unplug the old one and plug in the new one. No electrician required.
Due to standard electrical continuous-load rules (commonly referred to under NEC guidance), a NEMA 14-50 outlet supports up to 40 amps of continuous charging output.
Advantages of Hardwired Chargers
A hardwired charger is directly connected to your home’s wiring — no outlet in between.
Benefits:
- Supports higher charging speeds — up to 48A (vs 40A maximum on NEMA 14-50)
- More secure and permanent — can’t be accidentally unplugged
- Cleaner installation look with no visible outlet
- Preferred by some utilities and building inspectors
Advantages of Plug-In Chargers
The NEMA 14-50 plug-in setup offers something hardwired can’t: flexibility.
Benefits:
- Replace the charger without hiring an electrician
- Portable — take the charger to another property or bring it on a long trip
- Practical for renters who plan to take the charger when they move
- Easier to upgrade to a newer model as technology improves
Charging Speed Differences
| Feature | Hardwired (48A Max) | NEMA 14-50 Plug-In (40A Max) |
|---|---|---|
| Max Charger Output | 48A / 11.5 kW | 40A / 9.6 kW |
| Approx. Miles Per Hour | 40–44 miles | 34–38 miles |
| Speed Difference | ~6–8 miles/hour faster | Slightly slower |
| Real-World Impact | Minimal for daily driving | Minimal for daily driving |
For most daily driving needs (typically 30–60 miles per day), the difference is not noticeable in real-world use.
Long-Term Maintenance Considerations
If a hardwired charger fails or you want to upgrade to a newer model, you’ll need an electrician to disconnect and replace it.
With a NEMA 14-50 outlet, you simply unplug and swap in the new charger yourself. That’s a meaningful real-world advantage as EV charging technology continues to improve every year.
Which Option Is Better for Most Homeowners?
Own your home and plan to stay long-term? Hardwired is often preferred — cleaner installation, slightly higher performance, and a more permanent setup.
Rent, move frequently, or value flexibility? NEMA 14-50 plug-in is the smart choice.
Both options are excellent. There’s no wrong answer here — just a preference call based on your situation.
EV Charger Installation Checklist
Use this before, during, and after your installation to stay organized and avoid surprises.
Before Hiring an Electrician
- [ ] Identify your electrical panel size (main breaker label shows 100A, 150A, or 200A)
- [ ] Decide on preferred charger location
- [ ] Measure distance from the panel to the charger spot
- [ ] Check your car’s maximum onboard AC charging rate (owner’s manual or spec sheet)
- [ ] Search for utility rebates in your area
- [ ] Get 2–3 quotes from electricians with EV installation experience
- [ ] Confirm upfront that the electrician will pull the permit
Before Installation Day
- [ ] Confirm permit has been applied for (or already issued)
- [ ] Purchase your charger — or confirm the electrician is supplying it
- [ ] Clear the installation area of tools, vehicles, and clutter
- [ ] Mark your preferred charger mounting height and position
- [ ] Identify your car’s charge port location to plan cord routing
During Installation
- [ ] Confirm a dedicated circuit is being installed (not a shared circuit)
- [ ] Verify the breaker size matches your charger’s requirements
- [ ] Confirm GFCI protection is included if required by local code
- [ ] Take photos of all wiring before walls are closed or conduit sealed
- [ ] Ask the electrician to label the new breaker clearly in the panel
After Installation Is Complete
- [ ] Schedule the electrical inspection before activating the charger
- [ ] Test the charger after inspection approval if required by your local process
- [ ] Confirm charging speed matches expectations
- [ ] Set up the charger’s smartphone app and account
- [ ] Program your charging schedule to run during off-peak hours
Documents Homeowners Should Keep
- Charger purchase receipt and warranty registration
- Electrician’s invoice (itemized — equipment and labor listed separately)
- Permit and inspection sign-off documents
- Utility rebate application and confirmation
- Photos of the completed installation (wide shot + close-up of wiring)
- IRS Form 8911 (filed with your federal tax return)
Store these digitally and physically for tax, insurance, and resale purposes.
👉 For a detailed step-by-step tutorial: How to Install an EV Charger at Home (coming soon)
The Electric Vehicles & Charging team has tracked EV charger installation trends, costs, and utility incentive programs since 2021. We analyze contractor pricing data, manufacturer information, utility program details, and publicly available installation cost reports to provide accurate, up-to-date information.
Methodology: Cost ranges in this guide are based on contractor pricing data, manufacturer pricing, utility program information, publicly available market surveys, and residential EV charger installation estimates reviewed between 2024 and 2026. Actual costs vary by location, permitting requirements, labor rates, and site conditions.
Disclaimer: Smart Energy Edge provides informational research for educational purposes. This content does not constitute tax, legal, or investment advice. Incentives, tax treatment, and savings vary by location, utility policy, system design, and regulatory changes. Homeowners should consult qualified electrical, permitting, or installation professionals before making EV charger installation decisions.
Frequently Asked Questions
How much does EV charger installation cost?
Many homeowners with a 200-amp panel and an attached garage spend roughly $400–$1,200 for a Level 2 installation, though costs vary based on location and installation requirements. If your panel needs an upgrade, total costs can climb to $3,000–$6,000+. The biggest variable is your home’s existing electrical capacity.
Can I install an EV charger myself?
Some states allow homeowners to do electrical work on their own home with a permit. But Level 2 EV charger installation involves 240-volt live wiring, new circuit breaker installation, and panel work. This is high-voltage work — a wrong connection can cause serious injury or start a fire. Hiring a qualified electrician is strongly recommended for this type of project.
Do I need a permit for EV charger installation?
Yes, in most U.S. cities and counties. Adding a new dedicated electrical circuit requires a permit and inspection in the vast majority of jurisdictions. Skipping required permits may lead to insurance complications, failed home inspections, and resale issues.
How long does EV charger installation take?
The physical installation often takes 2–8 hours, depending on complexity. Including permit processing and inspection scheduling, the overall timeline is commonly around 1–4 weeks.
Can I install an EV charger outdoors?
Yes. Outdoor installations require a weatherproof charger (NEMA 3R or NEMA 4 rated), weatherproof conduit and junction boxes, and GFCI protection where required by local code. Properly installed outdoor chargers are designed to operate in rain, heat, cold, and humid conditions.
Can a 100-amp panel support EV charging?
Often yes — but you need a proper load calculation first. A 32-amp Level 2 charger draws about 7.7 kW of power. If your home’s other electrical loads leave enough headroom, a 100-amp panel can support EV charging. A smart load management device can help balance loads if capacity is tight.
Is a hardwired charger better than a plug-in charger?
Hardwired chargers support slightly higher charging speeds (up to 48A vs 40A on NEMA 14-50) and look cleaner. NEMA 14-50 plug-in chargers are easier to replace and more flexible. For most homeowners who own their home, hardwired is a slight edge. Renters and those who move frequently usually prefer plug-in setups.
What is the difference between Level 1 and Level 2 charging?
Level 1 uses a standard 120-volt wall outlet and adds 3–5 miles of range per hour. Level 2 uses a 240-volt dedicated circuit and adds 20–44 miles per hour. Level 2 requires a dedicated circuit installation. For any full battery EV owner charging daily, Level 2 is the practical choice.
Do EV chargers increase home value?
Research suggests EV-ready homes may appeal to more buyers and, in some markets, can contribute to higher resale value. A 2023 Lawrence Berkeley National Laboratory study found EV-ready features increasingly influence buyers’ purchasing decisions. The value impact varies by market and region.
Can I use solar panels with an EV charger?
Yes — and many homeowners do exactly this. Smart chargers can be programmed to charge during peak solar production hours, and some integrated home energy systems automate the process entirely. Pairing solar with home EV charging can significantly reduce electricity costs. For a closer look at potential savings, see How Much Do Solar Panels Save?
How much electricity does an EV charger use?
It depends on how much you drive. Most EVs use about 3–4 miles per kWh. For a typical driver covering 1,000 miles per month, expect to use roughly 250–330 kWh of electricity for charging. At an electricity rate of about $0.16/kWh, that works out to roughly $40–$55 per month. Actual charging and fuel costs vary based on driving habits, vehicle efficiency, and local energy prices.
Are EV charger tax credits still available?
Yes. As of 2026, the federal Alternative Fuel Vehicle Refueling Property Credit is still in effect. Eligible homeowners may qualify for a federal tax credit equal to 30% of qualified equipment and installation costs, up to $1,000, subject to current IRS requirements. Location eligibility requirements apply. Many states and utility companies offer additional incentives on top of the federal credit.
Can I install an EV charger in a detached garage?
Yes. This requires running a new electrical circuit — typically in underground conduit — from your main panel to the separate structure. Distance and trenching add cost (often $1,000–$3,000+ depending on the run length), but it’s a very common and entirely feasible installation.
What happens if my panel doesn’t have enough capacity?
You have several options. A smart load management device allows EV charging within your existing panel’s limits by dynamically adjusting charging speed. Using a lower-amperage charger (24A or 32A instead of 48A) reduces the demand. Time-of-use scheduling limits charging to overnight hours when home demand is lowest. Or a panel upgrade can provide additional electrical capacity and may be the most practical long-term solution.
Final Thoughts
Key Factors Every Homeowner Should Consider Before Installing an EV Charger
Before you do anything else, get clear on three things:
1. Your panel’s available capacity. Can it support a new 40–60 amp dedicated circuit? This is the question that shapes everything else.
2. Your car’s maximum charging rate. Check the owner’s manual. There’s no benefit to installing a 48-amp charger if your car maxes out at 32 amps.
3. Your installation location. Garage, outdoor, or detached structure each have different requirements, timelines, and costs.
Get those three right first, and the rest of the process becomes much clearer.
When to Hire a Licensed Electrician
For any Level 2 EV charger installation — hire a qualified electrician. That’s not a suggestion; it’s a strong recommendation.
This work involves live 240-volt circuits, new dedicated breaker installation, panel connections, and code compliance. It requires a permit and inspection in most jurisdictions.
An electrician with residential electrical experience who has done EV charger work before will get the job done safely and correctly on the first visit. Ask for their state electrical work authorization. Ask how many EV charger installs they’ve completed. Ask for a reference from a recent job.
These questions are reasonable. A qualified professional will answer them without hesitation.
How to Plan a Safe, Cost-Effective EV Charging Setup
Here’s the short version of everything covered in this guide:
- Start with a panel assessment — know your electrical capacity before buying anything.
- Choose a Level 2 charger that matches your car’s maximum AC charging rate.
- Pick a location close to your panel to minimize wire runs and keep costs down.
- Get your permit before work starts — don’t skip this step.
- Check for utility rebates before installation, and apply for the federal tax credit when you file your taxes.
- Program off-peak charging to cut your monthly electricity costs automatically.
Follow these six steps and you’ll end up with a safe, efficient, and cost-effective home charging setup that serves you well for a decade or more.
Next Steps for Homeowners Considering EV Charger Installation
Ready to move forward? Here’s what to do right now:
1
Step 1 — Check your panel.
Open your breaker box, look at the main breaker, and note the amperage (100A, 150A, or 200A). That number starts every installation conversation.
2
Step 2 — Get 2–3 quotes.
Contact local electricians and ask specifically about EV charger installation experience. Request itemized estimates.
3
Step 3 — Check for rebates.
Search your utility’s website and dsireusa.org. Apply for any rebates before installation starts — some require pre-approval.
4
Step 4 — Choose your charger.
Select a charger that matches your vehicle’s charging capabilities, installation location, and electrical capacity.
5
Step 5 — Understand your full cost.
Review equipment costs, installation expenses, permit fees, and any potential electrical upgrades before making a decision.
6
Step 6 — Claim your tax credit.
Check federal, state, and utility incentive programs to determine whether you qualify for tax credits or rebates.
A well-installed home EV charger will serve you for 10+ years. Depending on driving habits, electricity rates, and installation costs, many homeowners recover a significant portion of the installation cost through fuel savings over time. It’s a smart investment — and now you have everything you need to do it right.